Embroidery Stitches Guide (You Only Need These 7)!
The concept “Less is more” is well-known in many areas. However, when it comes to embroidery stitches Charles and I have found it to be a rather more novel approach. Since we began our embroidery journey, we never used more than 7 stitches.
We are strong believers that it’s not the number of stitches that will make you a better embroiderer. The opposite may even be true! Because when you have limited options, you tend to get more creative with how you use the respective techniques. Furthermore, if you’re a beginner of embroidery, it can easy get overwhelming with too many stitches at ones. If you feel overwhelmed, you are less likely to continue to stitch, which would be an absolute shame!
Concentrate on only the 7 techniques below and you will find yourself more motivated and encouraged.
How Can We Be So Sure Of The Minimalist Approach To Embroidery Stitches?
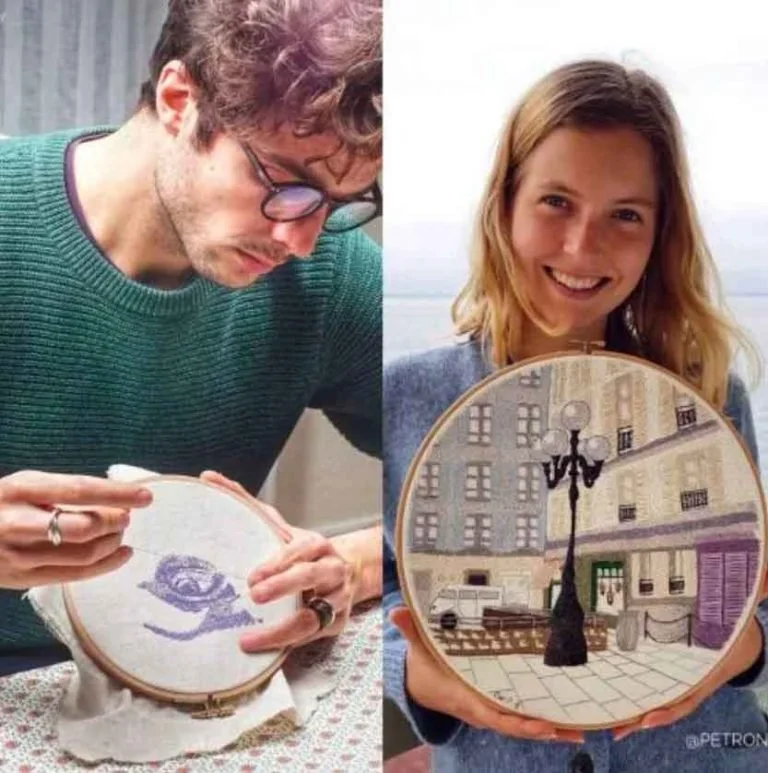
Over the past couple of years we have racked up a continuously growing audience of 230k+ (@petronella.art and @_charleshenry_). The focus of our work is the meditative process of embroidering by hand, as well as how to get a desired result. We both have a background in illustration, which gave us the freedom to approach modern hand embroidery from a liberal perspective. Without being limited by how you “should” and “shouldn’t” embroider a certain pattern, we have developed an authentic contemporary embroidery style.
Charles and Elin
Embroidery Artists
Modern hand embroidery is on the rise in popularity and we believe it’s a combination of fading restrictions and the relaxing effects of embroidering. To do hand work should be fun, liberating and accessible! Thus, why stay in the old stigma of overcomplicated embroidery stitches, when you can be free to experiment your own artistic style?
Furthermore, contemporary hand embroidery is increasingly present in fine art galleries and exhibitions. Hence, whether you look for embroidery as a fun diy hobby or as a potential fine art medium; less is more!
List of hand embroidery stitches that we will cover in this article
To give you an overview, we will cover the following 7 embroidery stitches:
Backstitch
Split stitch
Satin stitch
Straight stitch
French knot (referred to as knotted stitch in some countries)
Long stitch
Short stitch
Depending on your familiarity with the list of embroidery stitches above, you can scroll down to the technique you wish to look into. Let’s get into it!
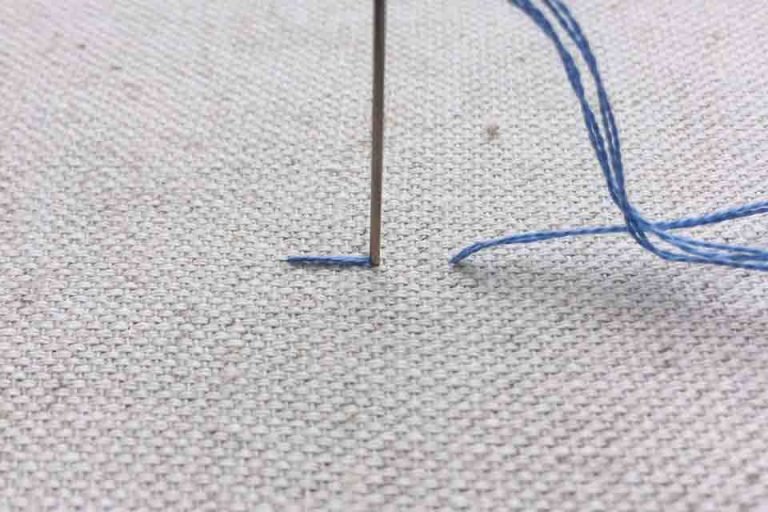
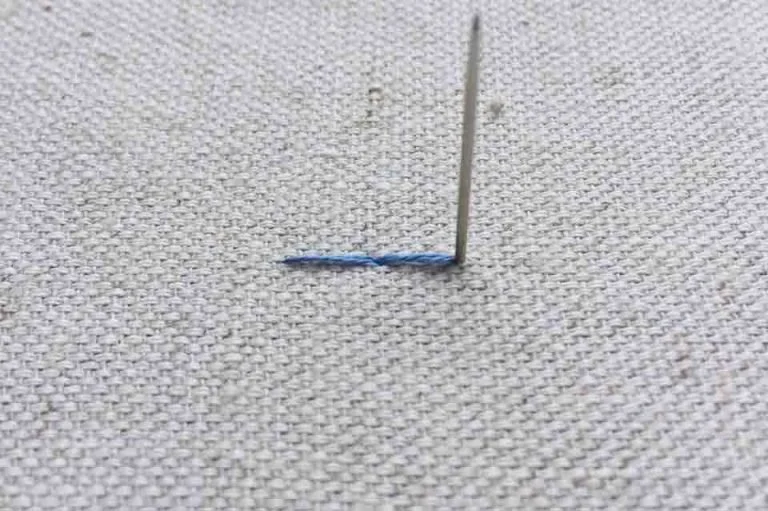
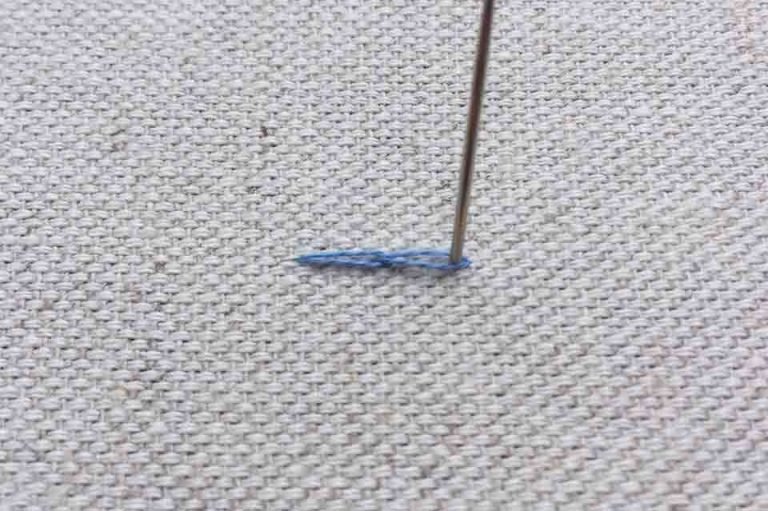
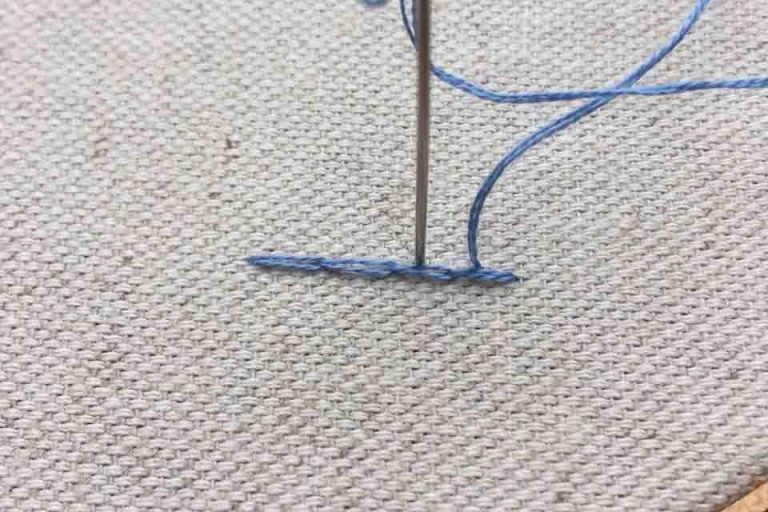
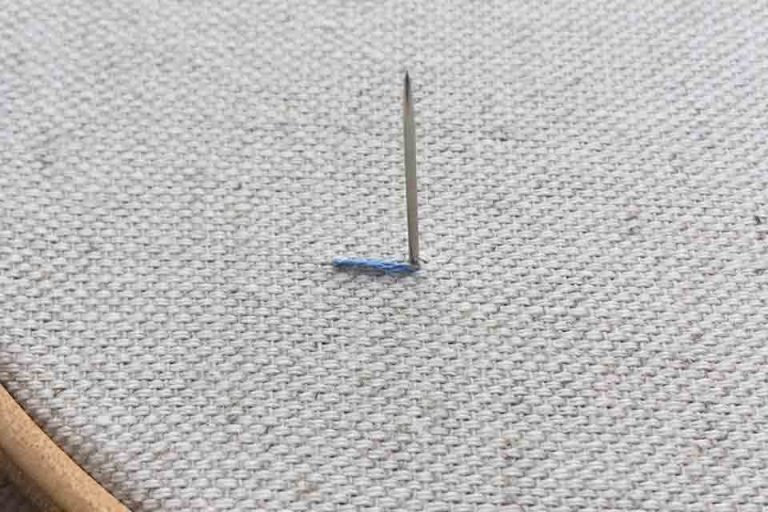
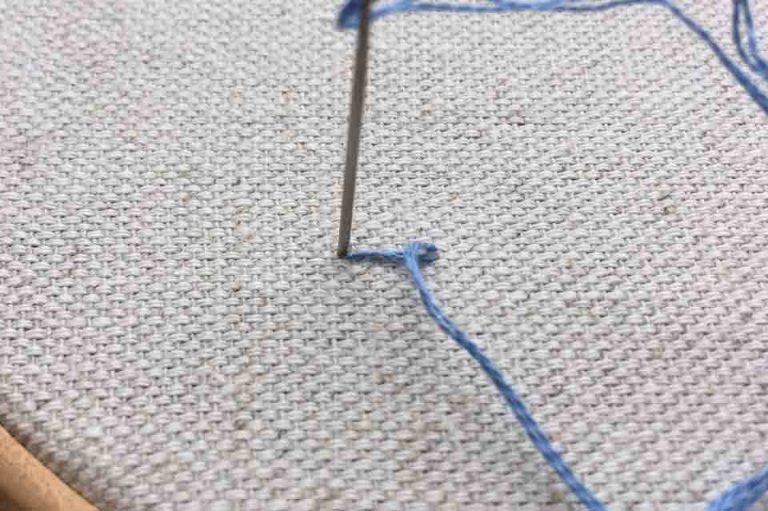
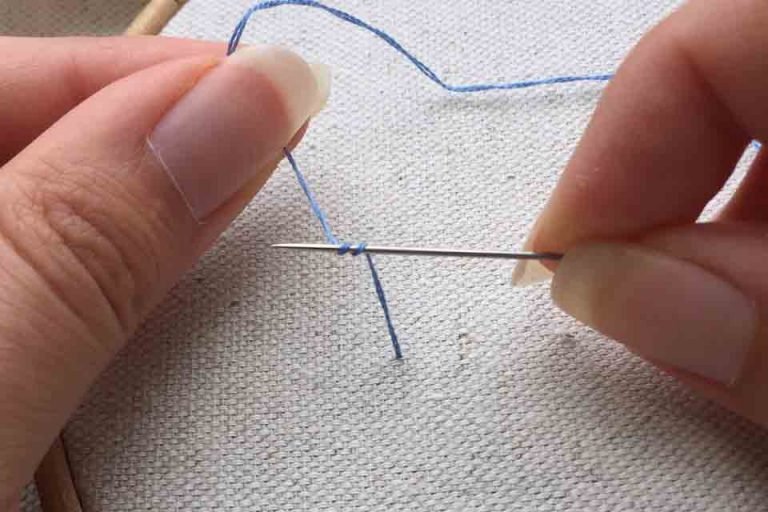
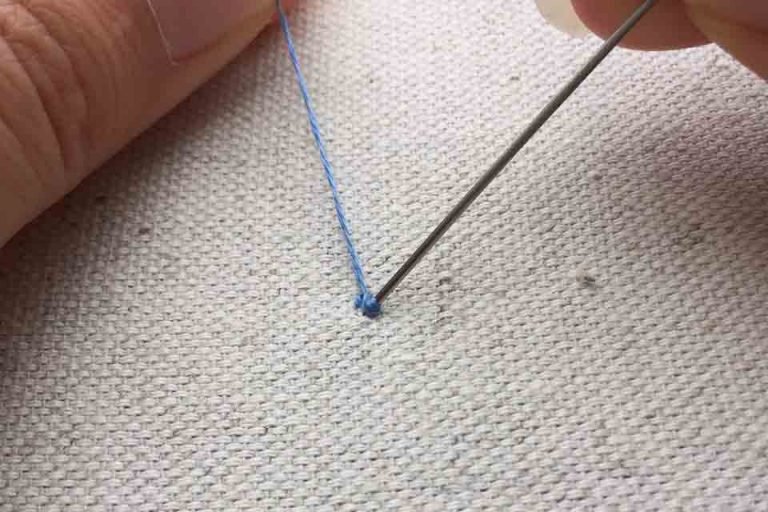
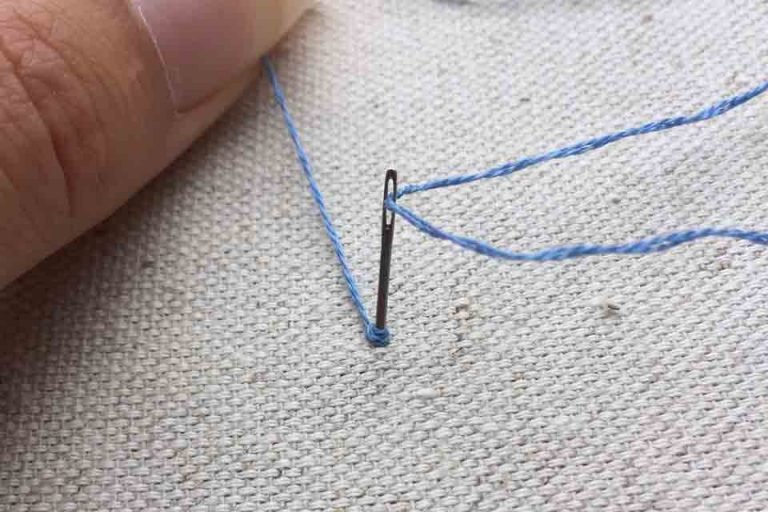
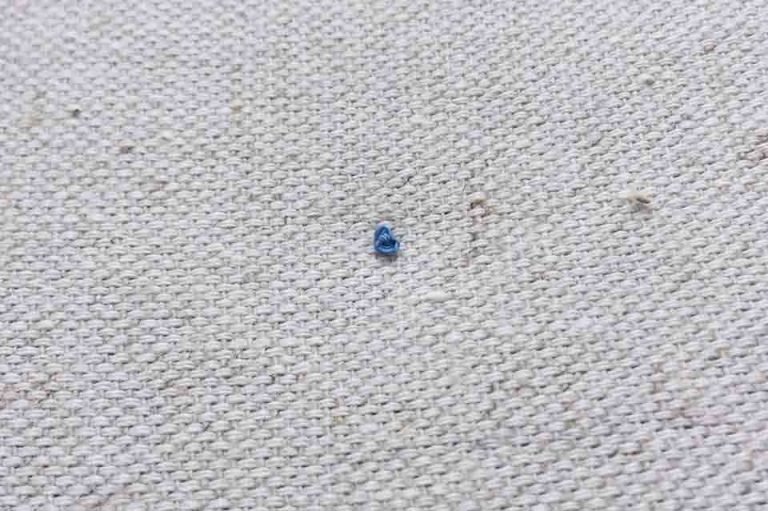
1. Backstitch
We put the backstitch technique first, because it is the embroidery stitch that we use the most! I dare to say that we use it for every single embroidery design that we create.
Why? Because the backstitch is the embroidery stitch that gives you the most neat and smooth lines. Our speciality for modern patterns are especially architectural and street scene designs. Hence, with urban thread patterns like these, the focal point is on neat contour work.
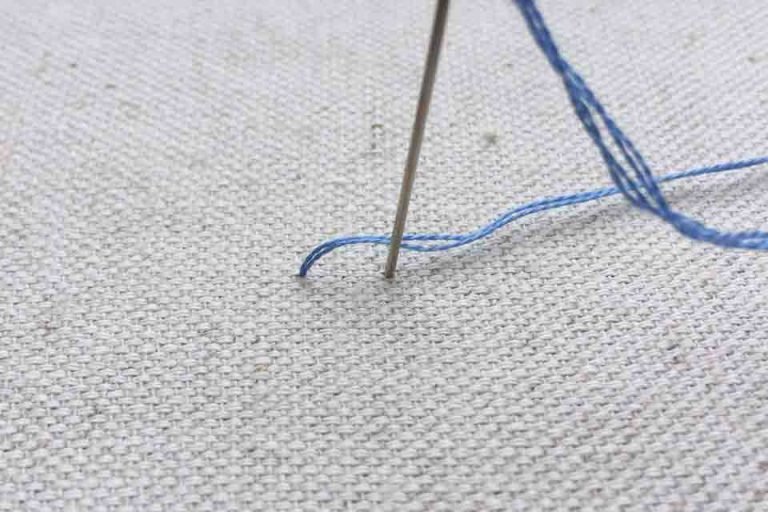
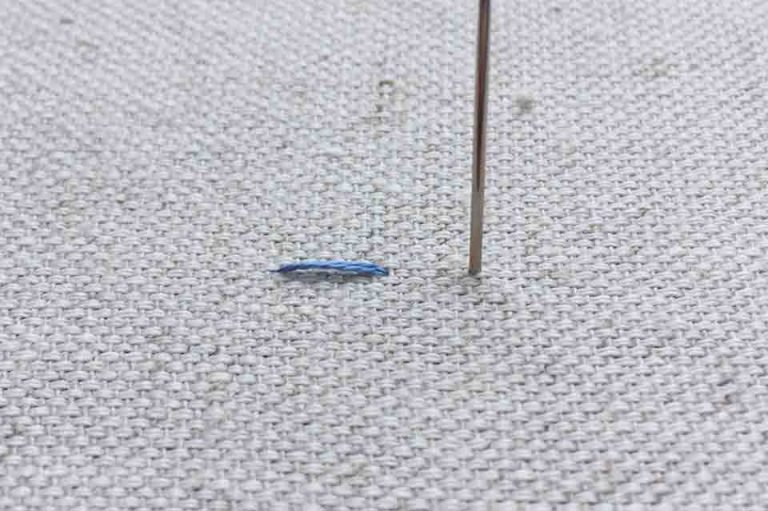
But how to backstitch?
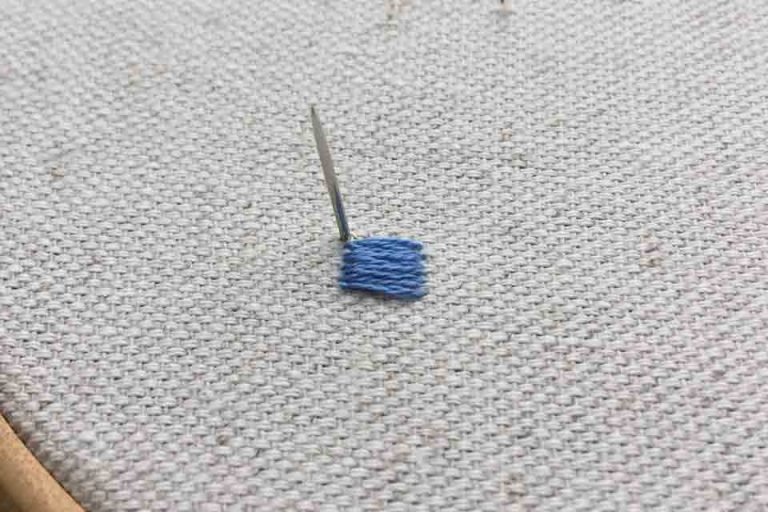
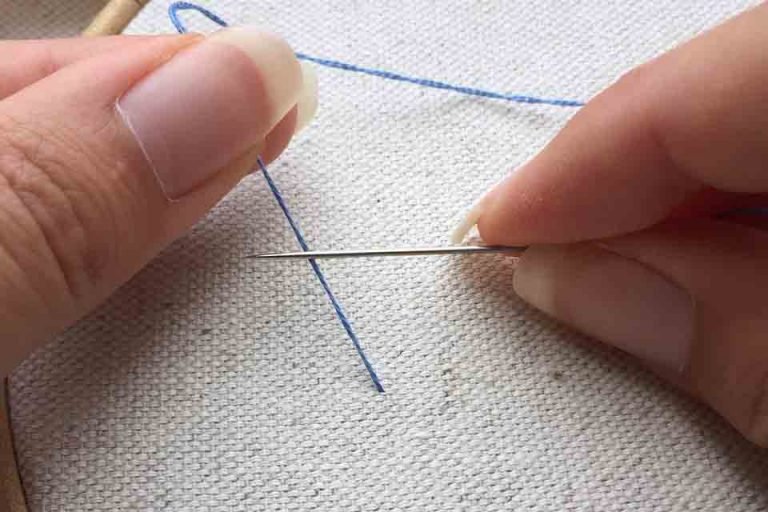
If it’s the first time you hear about this embroidery technique, we recommend you to have a look at our embroidery video library with tutorials of all the stitches that you can find in this guide. However, if you prefer to read rather than watch, the following images show you the step by step process of backstitch embroidery.
Don’t feel discouraged if your backstitches aren’t perfectly straight from the beginning. As with everything, you will get better and better at embroidering straight the more you practise. Therefore, we’ve put together a list of our top 7 backstitch patterns to assist you in the process. The bonus of stitching any of the suggested hand embroidery designs is that you will both improve your stitchery as well as create unique embroidered artworks.
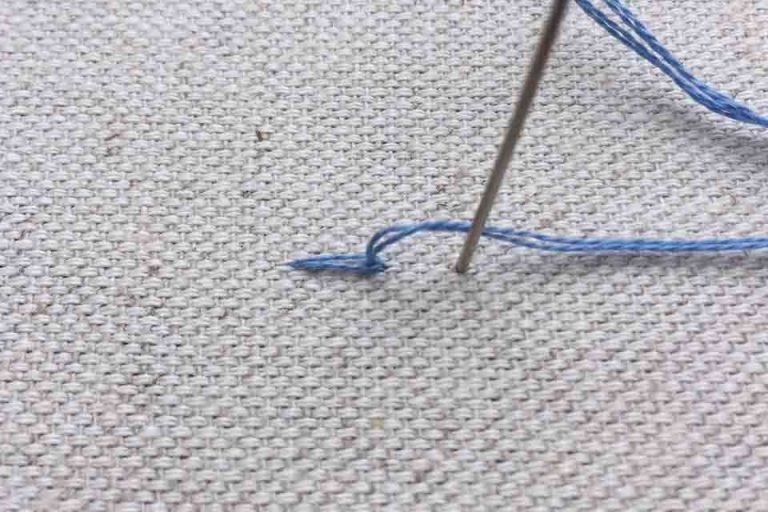
Two tricks on how to embroider straighter lines
Along with practising, we also have a couple of tricks that we often use for our own embroideries. The first one involves using the thread as a ruler. You place the thread tight on top of the fabric and pull it in the direction that you’d like to make your stitch. The straight thread will indicate where to put down your needle for a neat result.
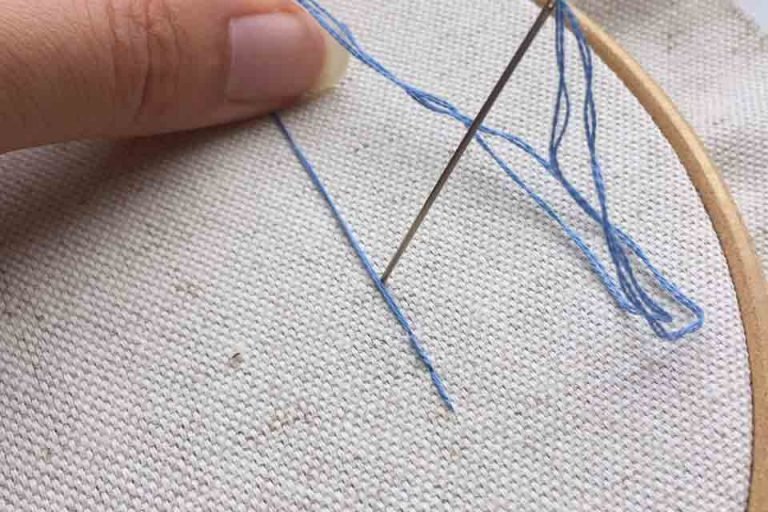
Backstitch tips
Use the thread as a ruler
Another technique, which Charles uses more often, involves using the needle as a ruler. You hold the needle flat against the fabric pointing towards the direction you want to embroider your line. Ones the needle is in place, it’s enough to push it through the fabric and the stitch will be perfectly placed.

Backstitch tips
Use the needle as a ruler
We recommend that you try the two tricks to find out which one works the best for you. After all, embroidery is about enjoying the process of stitching, which is why you must always listen to your own preference. However, you will never know your preference, unless you try different techniques first!
Use the backstitch to embroider round shapes
In addition to straight and neat lines, the backstitch is also perfect if you aim to stitch smooth rounded shapes. The best way to approach a rounded shape is by reducing the length of your embroidery stitches. When you make shorter stitches you have more control. Hence, don’t be hesitant as to how short you can make your stitches. Because there is no correct answer! Stitch them in the length where you feel the most comfortable and you get the shape you look for.
2. Split Stitch
The split stitch technique is another embroidery stitch that can be used in various ways. Either you can stitch straight lines or fill surfaces. If you choose to straight lines, it is recommended to have a slightly thicker thread (or more strands). Because if you are to split a single stranded thread you risk harming the thread or break it altogether.
Furthermore, it is easier to split a thicker thread than a thinner one. Thus, whether you choose to use the aforementioned backstitch technique or the split stitch for your contours depends on your preference. It also depends on the level of detail in your design. Many of our patterns for example, have a lot of finer details, which require thinner threads. However, if you look for a more impressionist result than the split stitch can be your go-to technique!

How to do smooth surfaces with the split stitch technique?
If you align split stitched rows close together, they will immediately begin to fill the surface. A trick to make the surface smoother is to align the rows every other one up and down respectively. As it is a bit complicated to describe in more detail I’ve attached illustrative images below.

The split stitch is perfect for filled surfaces that are in the “longueur”. In other words, if you are to fill a surface that is quite large, where you won’t be able to make one long stitch to cover the size, use the split stitch. If on the other hand you have a smaller surfaces where the stitch length from one end to the other is within good range, use the satin stitch.
3. Satin Stitch
As mentioned above, the satin stitch is perfect to fill smaller surfaces. In simpler terms, the satin stitch is essentially straight stitches that are stitched close together. With numerous parallel stitches of approximately the same length, you will have a satin-like effect. Thus if it’s the first time that you embroider the satin stitch, stroke your stitches with your finger to feel the smooth texture.
In the illustrative images below you can see the step by step process of one sided satin stitch. This means that you take up the needle just next to where you recently pulled through the thread. The one sided satin stitch minimises stitches on the backside as well as avoid to create bubbles, which can sometimes happen with the double sided satin stitch. Therefore we prefer the one-sided satin stitch!
Just be aware to not put the needle through the same whole as this will undo your previous stitch. Furthermore, if you feel that the surface isn’t as well covered as you’d like, you can easily go back and fill out the blank space later on.
4. Straight Stitch
The straight stitch is the most straight forward stitch technique as it corresponds perfectly with its name. You simply put up the needle at any point on your fabric. Pull the needle through and place it down a stitch length away in any direction. A stitch length may vary, but it’s approximately 1cm (0,4″) for controlled stitchery. I wrote in the section on backstitch how multiple shorter stitches will give you more control over your embroidery work than few long ones.
With the straight stitch technique you’re able to go wild! Stitch it in all directions, overlap and combine it with other stitches and colours. For this reason, it’s the embroidery technique that is commonly used to embroider details. For example, you can embroider horizontal straight stitches within a window shutter to emphasise the perception of the shutter.
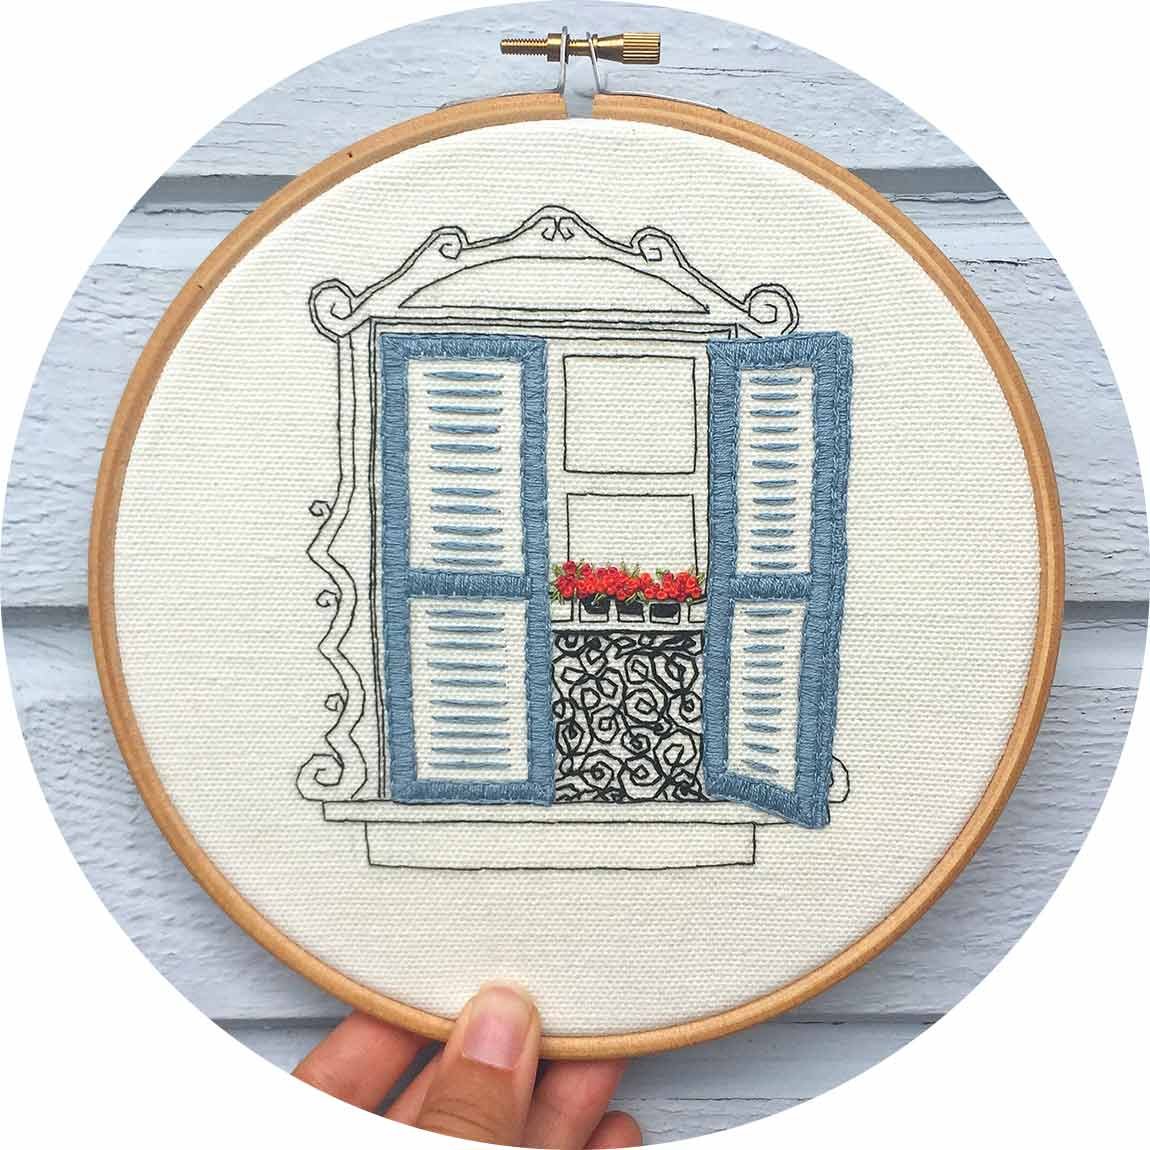
Example of an embroidery pattern, where we have used straight stitches to emphasise the shutters. In this particular example, we’ve layered straight stitches on top of each other to make them slightly thicker.

Embroidery Example
Another example of a hand embroidery design, with tiny straight stitches on the shutters. By simple measures you can greatly increase the perception of detail.
Another example is to use this technique for an embroidery leaf. But how to embroider leaves? Embroider straight stitches and let them all origin from the same hole. In other words, make the embroidery stitches form a v shape. Ones you have one embroidery leaf, it’s just a matter of placing more embroidered leaves in an “organic” fashion.
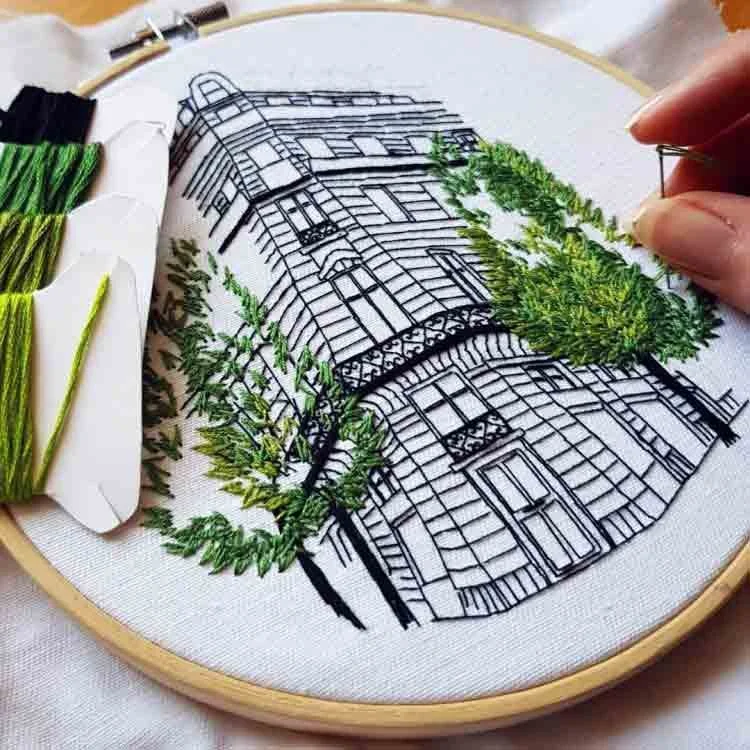
Close up process shot of one of our favourite Parisian patterns, where the majestic building on Rue Reaumur is framed by trees. The leaves on the trees are embroidered using the straight stitch technique stitched in overlapping v:s
5. French Knot – One Of The Embroidery Stitches With Two Referrals
The French knot is not only referred to as a French knot, but also as a knotted stitch. Neither Charles nor I have English as our first language. Hence feel free to use whichever term you prefer! When we first began to embroider, we had only heard of the French knot label. Thus it was quite fun to discover that hundreds and thousands of people call it knotted stitch instead!
But how to French knot?
This is another technique in the list of embroidery stitches that is easier to show in an embroidery video. Hence if you’re here because you wish to learn to embroider a French knot, we recommend you have a look at our free stitch-tutorials here. However, I will still try to explain it as well as I can with the help of some images below.
Disclaimer: I will explain how to French knot from a right handed perspective. If you’re left handed please replace the “right” with “left”.
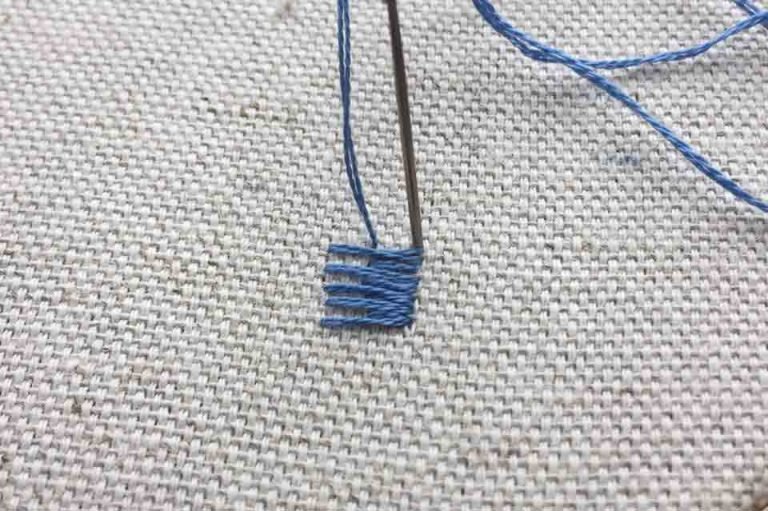
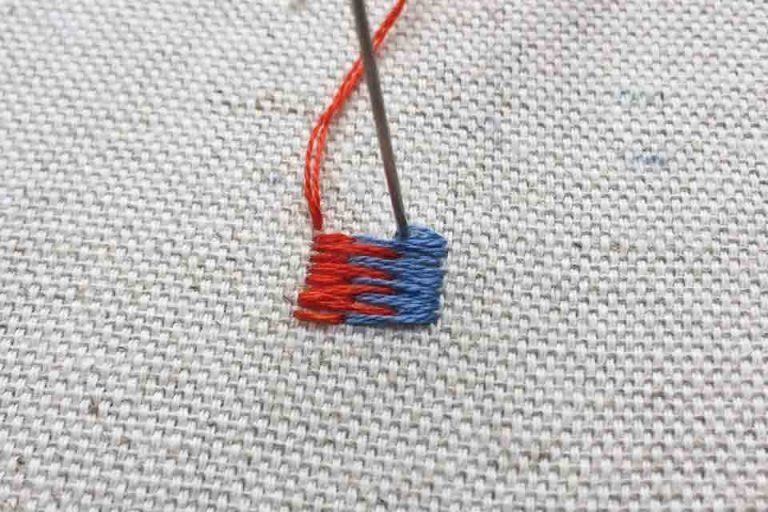
Begin by pulling the thread through the fabric. Thereafter you take the thread in your left hand and pull it towards the left. Simultaneously place the needle on top of the straightened thread (you hold the needle in your right). Then make the desired number of turns around the needle. We usually make two turns.

When you have done the two turns, you continue to hold the thread tightened. At the same time, bring the needle point down towards the fabric. Place it just next to where the thread came up and push through. As you push through, continuously keep the thread tightened. By never letting go (until last minute), you ensure a neat and controlled knot.

Ones again, if you wish to have a loose and impressionist knot you can choose to let go earlier. However, if you want to use the French knot for a flower embroidery or similar, it is advised to keep them neat.
Tips on how to use the knotted stitch technique for various effects
The French knot can be used for numerous things as well. The most frequent use is when you aim to add texture to your embroidery design. By making knotted stitches next to each other, you create a highly textured surface, which you can easily distinguish when you run your fingers over your embroidery.
One of the things that made Charles and I fall in love with the hand embroidery medium, was the ability to add 3D effect. Hence, the French knot is one of the embroidery stitches that allows for most texture.
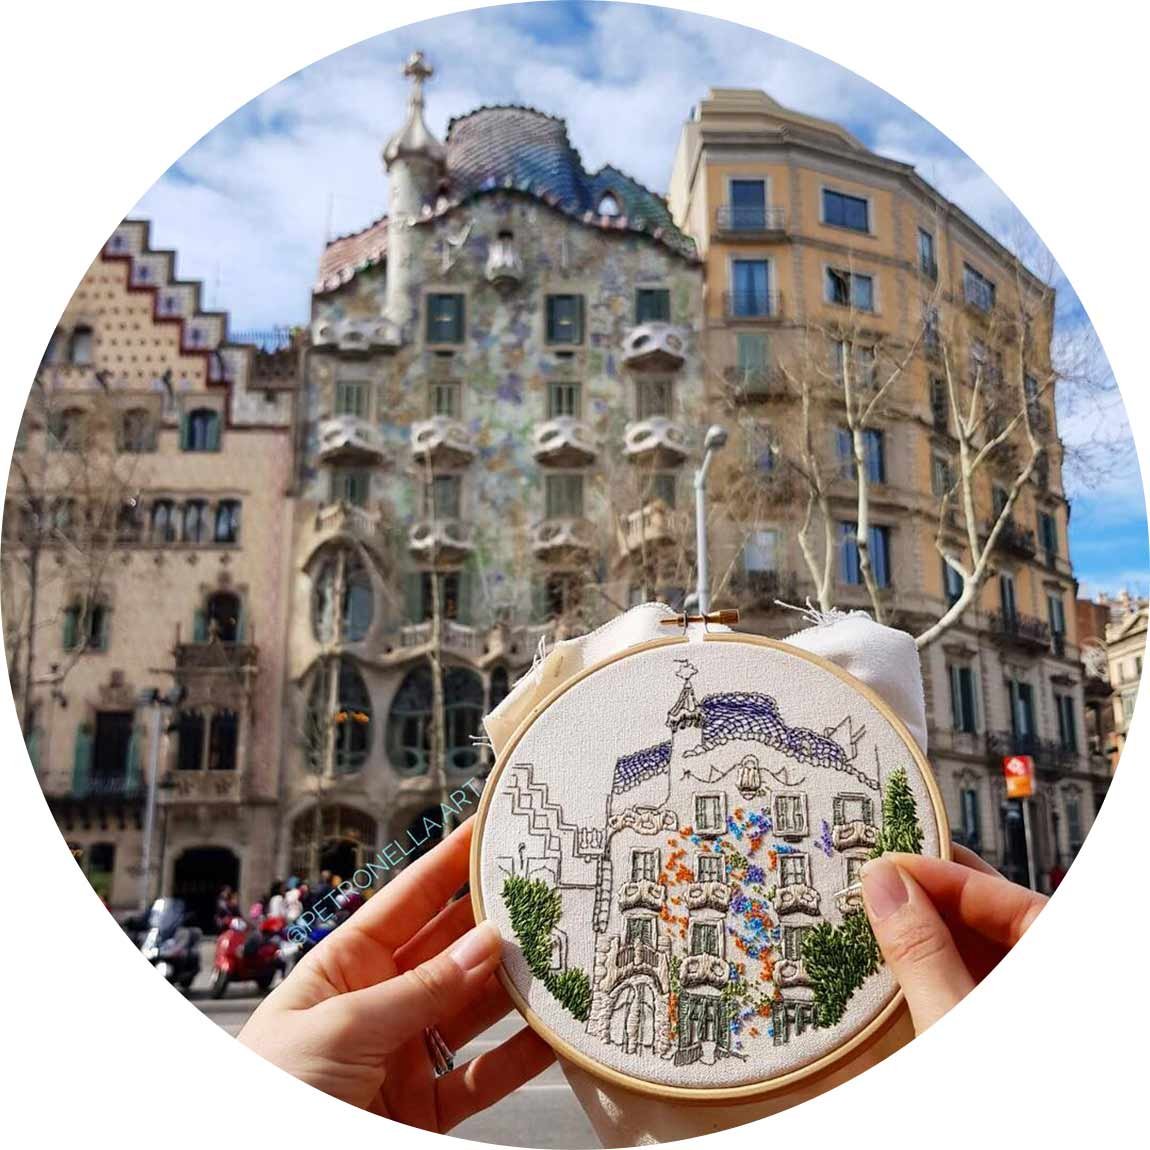
Example of hand embroidery pattern where the French knot technique has been used to stitch the mural. Each knotted stitch represent an individual tile on this Casa Batlló design.
6 + 7 Long And Short Embroidery Stitches
The long and short stitches are almost always used together, which is why I chose to put them under the same headline. The reason is that a single long or short stitch would translate into a straight stitch. Thus, to distinguish the long and short stitches from the straight stitch technique, they are coupled together.
The long and short stitches are another way of effectively covering surfaces. Thus this these are the embroidery stitches that are frequently used for threadpainting designs. The goal with threadpainting is to imagine your thread as being the paint and the needle your brush. Hence, you aim to blend the stitches smoothly together by variating long and short stitches.
On the images below I have tried to illustrate the approximate placement of the short and long stitches by using different colours. This technique is ideal for embroidery designs where you wish to blend or make smooth transitions. For example a sunrise or sunset. Another example is for flower embroidery, where you often want to have a different nuance closer to the stem than at the edges of the petals.
Now it’s your turn to use these embroidery stitches to create your own master piece!
The above was our list of hand embroidery stitches that we’ve used throughout our career. They are actually the only techniques that we think you need to learn. The better you learn them, the more you’re able to feel free and confident in your experimentation with them. Thus it all goes hand in hand. Stitching, practising and your desired results.
We hope that this article helped to inspire you to try out this incredible art medium! Hopefully it inspired you to the extent that you may even want to try out to make your won embroidery designs. If that sounds like you, we’ve got exactly what you need.
As a follow-up to our embroidery workshops and step-by-step online courses, we’ve developed a Masterclass that allows you to take the next step. Because after you’ve tried out some stitches and perhaps a pattern or two (or many), your creative desire needs something more.
The ultimate creative satisfaction comes from designing your own embroidery patterns. This can mean to design embroidery patterns for commercial purposes, or purely for the enjoyment of the creation. It can even mean the first step on your artistic career, which can take you down routes you’d never expect. Trust us, when we first began to do embroidery in our tiny roof top studio in Paris, we had no clue where it would bring us.
Hand embroidery is everything but a dying medium and we couldn’t be more thrilled to have you join us on this movement!
You can find our online Masterclass on how to create your own embroidery design by following this link

Create Your Own Embroidery Design
Click on the image to learn more.